[Solved] Skoda 1.9 TDi P0321 16705 G28 Sensor Implausible Signal Fault Code

I recently experienced and fixed the P0321 / 16705 fault code on my Skoda Fabia VRS 1.9 TDI with the PD130 BLT engine. This engine is the extremely common VAG PD 1.9 turbo charged diesel engine as used in many models of VW/Audi/Skoda.

During diagnosis of this problem I did a lot of research concerning the P0321 fault code which is for the G28 engine speed sensor implausible signal which I thought I would share, as well as what the final solution to the problem was.

The ross-tech wiki lists the following information regarding this code:

P0321 / 16705 fault code information

Possible Symptoms

  • Engine shuts off
  • Engine doesn't start
  • Speedometer inoperative
  • Glow Plug Indicator Lamp (K29) flashes

Possible Causes

  • Engine Speed Sensor (G28) loose
  • Engine Speed Sensor (G28) faulty

Possible Solutions

  • Check Engine Speed Sensor (G28)

Special Notes

  • The Engine Speed Sensor (G28) is also used as a reference sensor for the crankshaft position and correlates with the Camshaft Position Sensor Bank 1 (G40) and Camshaft Position Sensor Bank 2 (G163).
  • When an engine will not start due to mechanical (spark/fuel/compression/timing) related issues it is not uncommon to set a false G28 fault codes due to extended cranking with a no-start condition.

My symptoms:

  • The car would not rev above approximately 3400rpm
  • If you tried to rev over 3400rpm the limiter would cut in and it would trigger the 16705 fault code.
  • This fault code would illuminate the check engine management light and also flashing glow plug light.
  • Once the fault code was triggered you would not rev over approx 3400rpm.
  • If you did not rev over 3400rpm you could drive the car as normal.
  • Car would start without hesitation hot or cold.
On these engines the ECU uses the values from the G28 crankshaft position sensor and G40 camshaft position sensor to determine crank angle relative to camshaft angle. In VCDS this is known as torsion value or syncro angle.

Because the ECU looks at the relationship between these two values, if one value is implausible then it will struggle to tell which sensor is at fault. In my case it is suggesting that the value from the G28 sensor does not match the value from the G40 sensor.

The fault code first appeared after I had the timing belt changed and I also changed the thermostat. 

As this issue is related to timing my first thoughts were that it was something to do with the timing belt change. Perhaps the timing was not correct or the belt tension was wrong or the camshaft sensor had been knocked during the work.

Looking into this further I removed the top timing belt cover and checked the timing belt tension as well as the little tabs which are on the engine side of the camshaft pulley - these are used by the G40 sensor and if one of them was bent this might prevent the sensor from reading the position correctly. No problems found.

I also read the syncro angle using VCDS and it was fluctuating between -1.1KW and -1.7KW which is within range - this rules out the timing being incorrect.

I also had to change the thermostat around the same time. The thermostat on this engine is on the front of the engine to the left hand side which is close to where the wire for the G28 crankshaft sensor runs from the plug at the top to the sensor position at the bottom under the oil cooler.

Solution


In the end the G28 crankshaft sensor was faulty and I think it was caused by coolant running down the cable sheath and going directly into the sensor itself...or it could just be a coincidence.

Once the G28 sensor was replaced with a genuine VW item the issue was cured completely.

1.9 tdi blt G28 crankshaft sensor behind oil cooler
G28 crankshaft sensor location behind oil cooler
G28 sensor highlighted in red


Mazda MX5 NA Replacing Broken Corroded PPF Ground

If you are experiencing any sort of electrical or starting issues it is always worth checking all your grounds or earth straps as they are also known.

On the Mazda MX5 there is an important earth on the PPF which provides a really strong connection to the engine block. Due to this earth location being low to the ground it is fairly common to find this connection badly corroded or even snapped completely (see below).


If you want to replace this PPF ground strap entirely then this is the spec:
  • Length: 1500mm
  • Size: 16mm² 
  • 6mm ring lug terminals on both ends


When replacing the cable it is a good idea to give the area on the PPF a good clean to remove any corrosion and ensure a solid collection. I used a wire drill bit attachment to do this.

Then it's just a case of feeding the cable through the grommet and into the boot. At the battery end I simply bolted the new cable on top of the original connection. Secure with cable ties to stop chaffing.


[SOLVED] How much do Mazda MX5 baby teeth/tie down hooks weigh?

mazda mx5 tie down hooks baby teeth
You may have noticed the two ugly looking (probably rusty by now) "tow hooks" pointing out the front bumper of your MX5 NA.

These are not actually tow hooks but tie down hooks used for securing the cars when they were being shipped from Japan to different countries.

They have affectionately been nicknamed the baby teeth by Miata enthusiasts partly due to them kind of looking like teeth sticking out the front bumper, and partly because many see it as a right of passage for owners to "pull them out" when they first get their MX5.

weight of mazda mx5 baby teeth
The weights of the tie down hooks are often exaggerated so here are the definitive weights for both front and rear tie downs as I have just removed them from my car.
  • Front tie down hooks: 1.3kg
  • Rear tie down hooks: 1.5kg
  • Both front and rear combined: 2.8kg
The weight might vary within a few grams depending on how rusty they are. :-D

Should you remove the baby teeth?
Will you notice that kg, no, but as far as weight saving goes on cars, it's a very easy win at no cost to comfort or practicality. Probably the easiest 2.8kg you will ever save...

Some people use the baby teeth to tow the car, so bear this in mind if you do decide to remove them. However this is not what they are designed for and Mazda do not recommend using them for this purpose.

In my opinion the front bumper looks much better without the tie down hooks sticking out, especially if they have gone rusty.

How to remove MX5 Miata baby teeth?
The front baby teeth are held in place by three bolts on each tie down hook, these can be reached by turning the wheels to full lock and then reaching in from the wheel arch. As you would expect, they are likely to be rusted so it's advisable to soak with a penetrating oil before as it can be awkward to get a good angle for putting a lot of force through the spanner.

The rear are held by two bolts (I think) and can also easily be removed without needing to jack the car up.

[Guide] Fitting Running/Side Marker Lights To Mazda MX5 NA

Mazda mx5 side marker lights

Fitting running/side marker lights to your Mazda MX5/Eunos Roadster is a subtle mod to make your car stand out a bit and increase visibility to other road users, it's also ridiculously easy to do yourself even if you have never worked on car electrics before.

US spec cars have orange running lights in the front and red running lights in the rear, however UK and JDM spec MX5's have reflectors instead.

Fortunately for us it's very easy to fit bulbs in these reflectors and wire up the side marker lights to be come on with the side lights.

Tools needed:
  • Cross head screwdriver
  • Wire strippers/cutters
  • Crimping tool
  • Drill
  • Large flat head screwdriver
  • Pliers


Parts needed:
  • 2 x 501 (W5W) bulb holders
  • 2 x Amber 501 bulbs
  • 4 x Cable Lock (Scotch Lock) Connectors
  • 4 x Butt connectors
  • 2 x cable ties
  • Electrical tape
  • 8amp wire

Step by step guide
Remove side reflectors and make hole in the rear to fit bulb holders. To remove them just undo the two phillips screws on either side and then gently pry out.

mazda mx5 side marker reflectors

The only difference between the UK and US side reflectors is that a hole was not made in the rear. So all we have to do is make that hole.

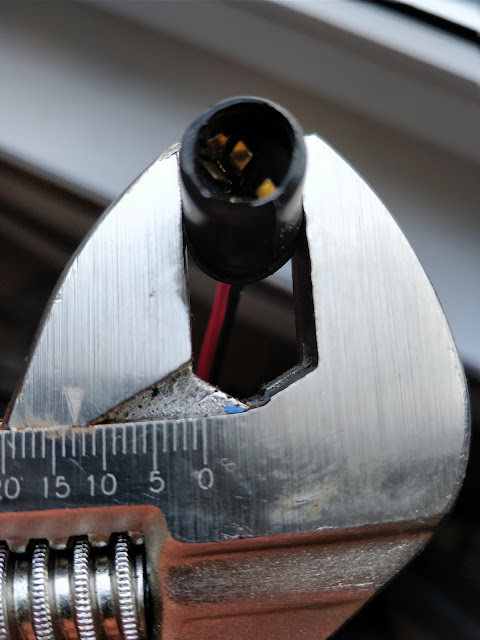
501 w5w bulb holder

Use something to measure the diameter of the bulb holders so you know how big to make the holes. The plastic is very soft so go slowly and no need to put much pressure on the drill, you don't want to fly through and damage the lens.


My bulb holders were about 13mm and I didn't have any drill bits that big, so I just went as big as I could and then gradually increased the size of the hole with various flat head screwdrivers. This worked very well as the plastic on the rear of the side marker is very soft.


You want a nice tight fit so the bulb holder doesn't fall out and water and dirt can't get in. You can secure the bulb holder with silicone or similar but I wanted to make it easy to change the bulbs so chose not to do this.

Remove sidelight/indicator unit and thread wire through to wheel arch

Mazda mx5 Miata side light wiring

Again just two phillips screws to remove the sidelight, both bulb holders twist to unlock.


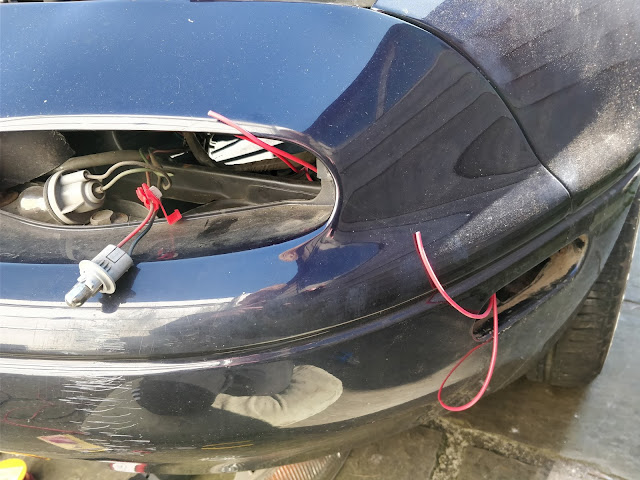
Pop up your headlights and there's a few holes to feed the wires down into the wheel arch directly under the headlight. I routed the new wires under some of the original wiring to keep it tidy and stop it from flapping around.

Fit cable lock connectors to positive and ground from the side light


The good thing about the cable lock connectors (also known as scotch locks) is that you do not need to cut any wires to tap into the connection. Watch out that both wires are centred in the connector to ensure a good connection is made.

Connect bulb holder to new wiring


The 501 bulb holders that I bought came with approx 7cm of cable so this needed to be connected to the new cable I just installed. To do this I used bullet connectors from Halfords as a temporary measure however I am intending to solder and shrink wrap this connection as that is a more permanent solution.

Fit amber bulbs and refit reflectors


You want to check at this point that everything is still working as it should. Sometimes the scotch lock connectors can be a bit temperamental. So give everything a good wiggle and tug to make sure it's not going to lose a connection as soon as you go over a pothole.

Secure wire with cable ties


Your bumper should have this bracket in it which is ideal for securing the wires to stop them flapping around in the wind.

You're done


Like this guide? Spotted that i've done something really dumb? All comments welcome below.